Deploying a Hyper-V VM using Octopus - Part 1: The Template
This is the first in a multi-part series of deploying a new Hyper-V Virtual Machine (VM) using Octopus where I'll go through how to create new VMs for dev/test purposes. By the end of the series, we'll have created a project in Octopus that will allow us to create a (domain joined) IIS VM or a SQL Server VM on any Hyper-V host.
In this post, we'll go through creating a new VM, installing any pre-requisites we need on the machine, sysprepping it and finally exporting it to capture the virtual hard disk file we'll need for later.
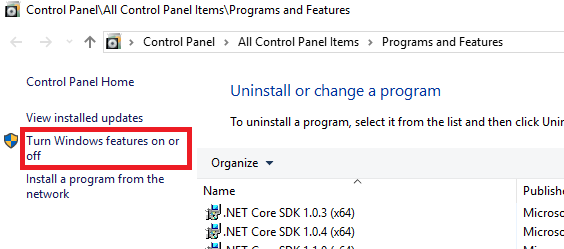
First of all, I'm using my laptop for this (Win 10 Pro) and so I need to ensure that I have Hyper-V installed locally, though you could of course use whatever Hyper-V server you have access to. Also, you will need local admin rights on whichever machine you do this on. On Win 10 Pro, you can install Hyper-V through the control panel. Open an explorer window and put the following in the path:
Control Panel\All Control Panel Items\Programs and Features
You should end up with the following 'Programs and Features' window and can then click on 'Turn Windows features on or off':
Which will bring up the 'Windows Features' dialog and allow you to select 'Hyper-V':
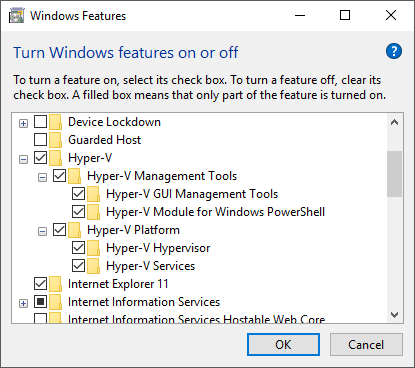
Click 'OK' and the install will start.
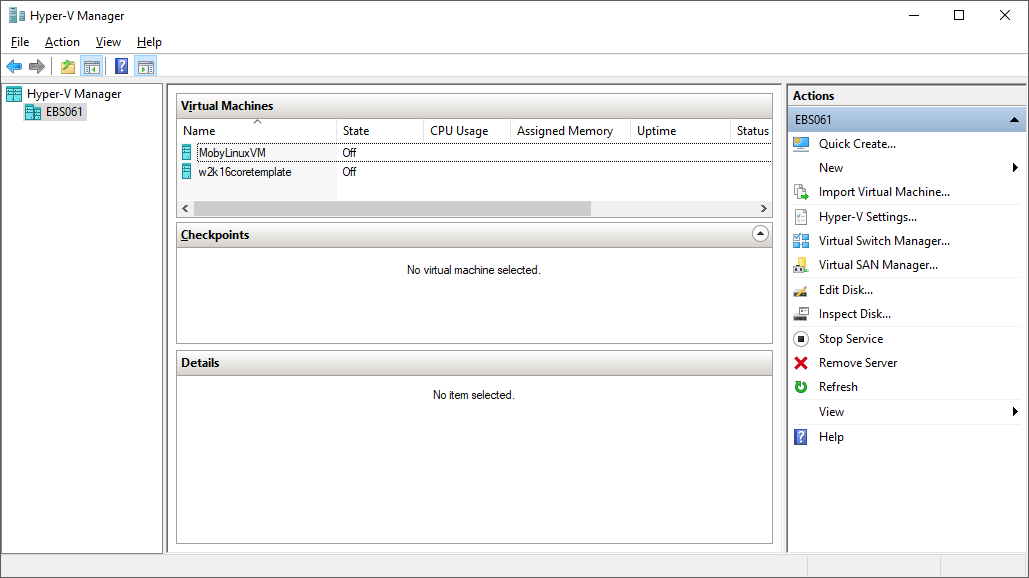
Once that's all done, you should now have access to the 'Hyper-V Manager' which should look something like this (minus the two VMs I already have there):
Before we create our VM, we need to download an Operating System installer disk and for this, I'll be using Server 2016 (Core/Without Desktop Experience). Next select 'New' --> 'Virtual Machine' from the 'Actions' menu on the right-hand side of Hyper-V Manager.
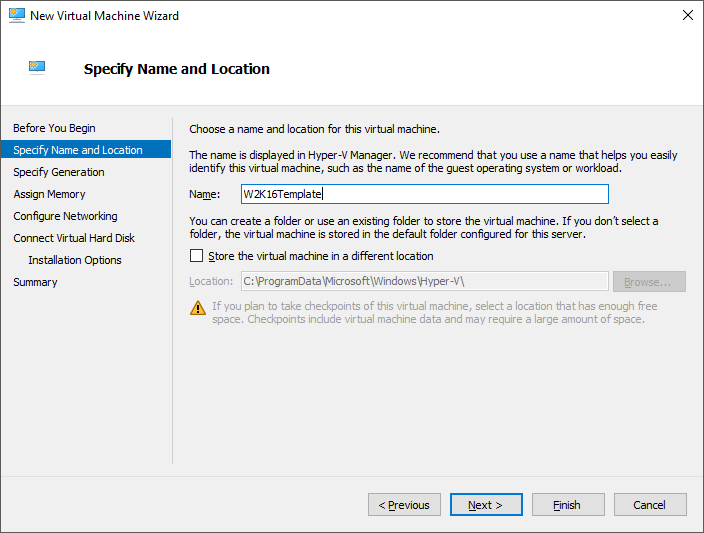
Click Next on the first page of the wizard and then enter a name for the virtual machine and go to the next screen. Here I'm using 'W2K16Template' for the VM name:
Here I'll select 'Generation 2' because I have no requirements for backwards compatibility with previous versions of Hyper-V:

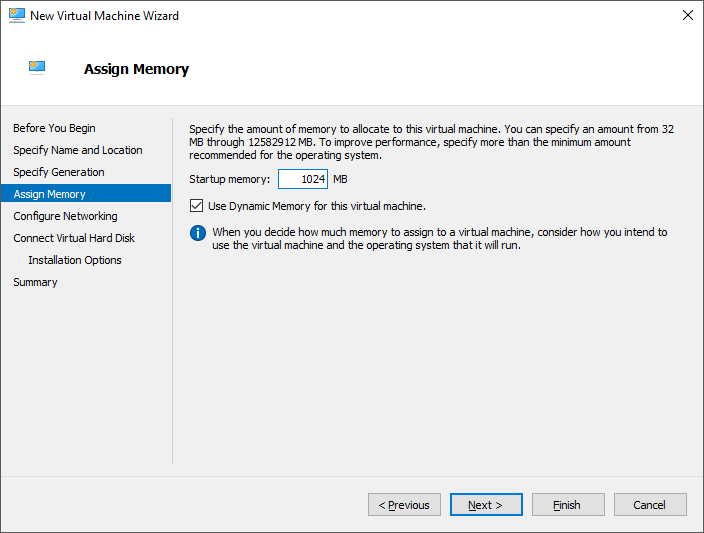
Next, I'll set the startup memory to 1024MB. Server 2016 only has a requirement for 512MB, but for install it requires 800MB and I find it sluggish with anything less than 1GB.
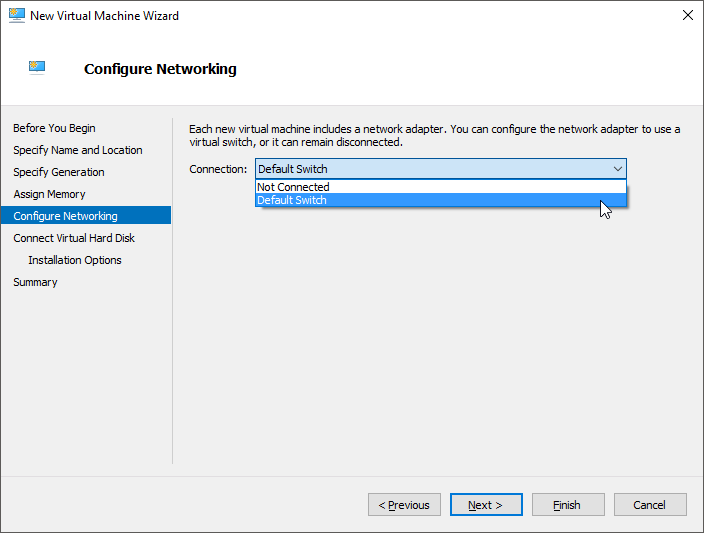
Select the switch you want to connect the machine to on the next screen; 'Default Switch' which comes installed with Hyper-V will be fine for our purposes and go onto the next screen.
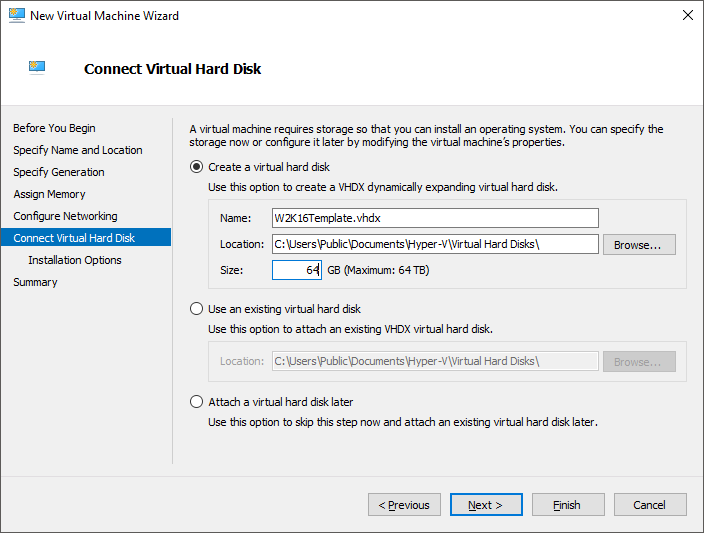
Set the size of the disk to a suitable number; here I'm using 64GB because these machines never have anything but the OS installed on the C drive and that seems to give enough space for a few years of regular patching. Though these machines are unlikely to be so long lived. If you don't have 64GB available, don't worry, this disk only takes up space used by default; it doesn't provision the whole 64GB when it's created.
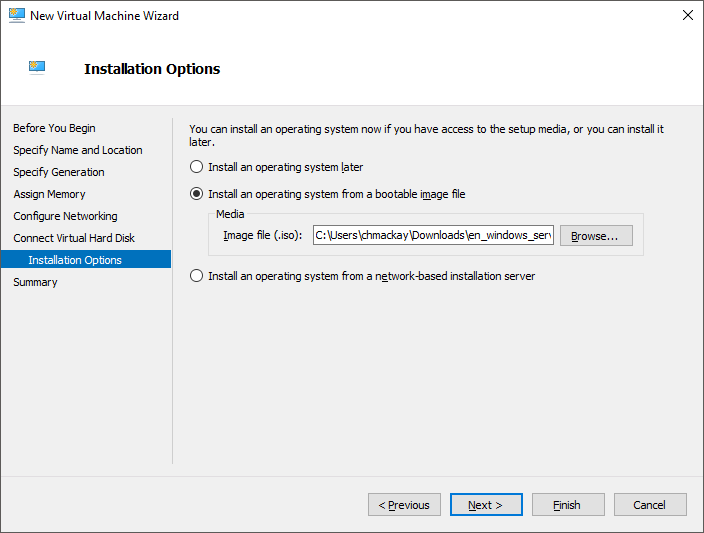
Now we'll select to boot the machine from the .iso file that we downloaded earlier:
Finally, we can click 'Finish' and the VM will be created for us.
Select the VM in the manager window and click 'Start' from the actions menu. Now click 'Connect' from the actions menu. A console window should appear and the VM will have booted into the OS install disk. Following these steps through the OS install will get the install going for Server 2016 without a GUI, i.e. Core/No desktop experience:
- Select your language preferences
- Install
- Don't enter a product key at this point, just click on the 'I don't have a product key' text at the bottom of the screen
- Select 'Windows Server 2016 Standard' and click next
- Read and accept the licence terms if you're happy with them
- Click 'Custom: Install Windows only (advanced)'
- Ensure 'Drive 0 Unallocated Space' is selected and click next
- The windows install will begin.
Now is probably a good time to grab a break whilst the OS installs.
Once the install and all the reboots have completed, you should get a command prompt that looks like the below:
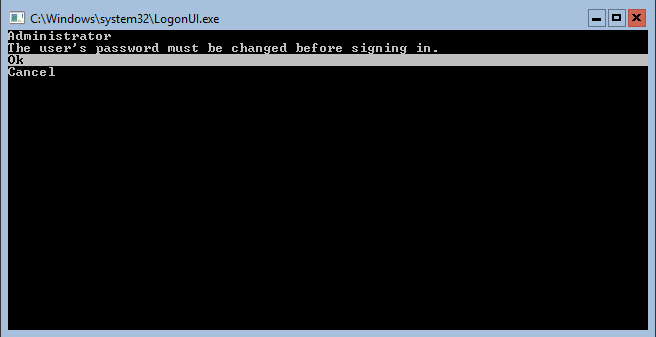
Reset the password and enjoy using the keyboard to get around your brand new server! Once the admin password has been reset, you'll be logged in and dropped into a command prompt window.
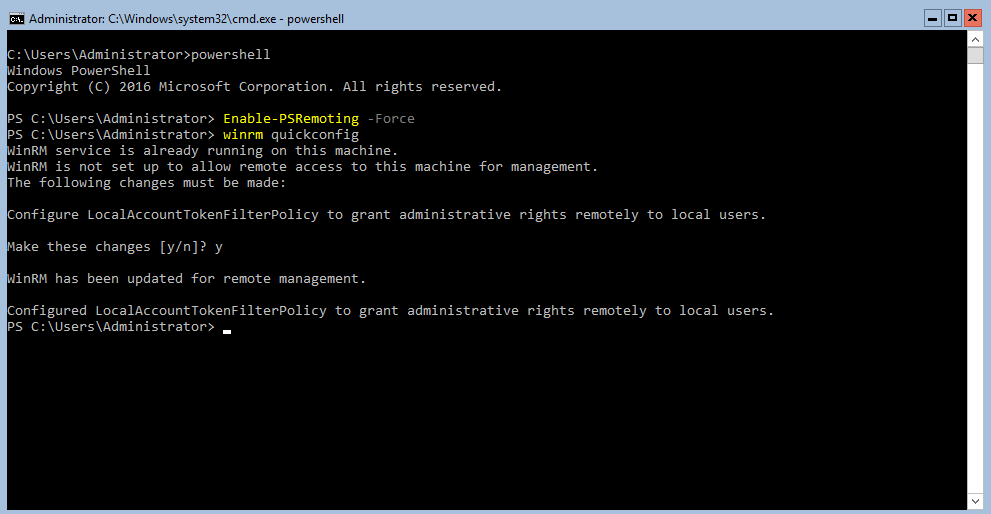
Next, we need to enable remote management so that we can easily copy files over and manage the machine remotely later. First, start PowerShell:
[code language="bash"]
powershell
[/code]
And now run the following two commands:
[code language="powershell"]
Enable-PSRemoting -Force;
winrm quickconfig;
[/code]
The first command should return no output and the second one should ask you if you wish to make changes to allow remote management, leaving the console window looking something like the below:
Now we can attempt to connect to our VM remotely using the following script, simply substitute in the correct name of the VM into the $vmName variable and change the local admin password for the VM:
[code language="powershell"]
# Enter your VM name here
$vmName = "W2k16Template";
# Enter the local admin password for the VM below
$localAdminPassword = "Your_Local_Admin_Password_Here";
# Get the IP address of the machine
$ip = (Get-VM -Name $vmName | Select-Object -ExpandProperty NetworkAdapters).IPAddresses[0]; # Not great, but it seems to do the trick
Write-Host "VM IP: $ip";
# Add the IP of the VM to those that we're allowed to remotely manage
# NB. This will clear out any existing entries
Write-Host "Adding IP to list of allowed RM clients...";
Get-Service winrm | Start-Service; # Start the WinRM service
Set-Item WSMan:\localhost\Client\TrustedHosts -Value $ip -Force;
# Create the credentials for the session
$password = ConvertTo-SecureString "$localAdminPassword" -AsPlainText -Force;
$cred= New-Object System.Management.Automation.PSCredential ("Administrator", $password );
# Create a new remote session
Write-Host "Connecting to remote machine...";
$s = New-PSSession -ComputerName $ip -Credential $cred;
# Connect to the machine and run a command to prove it's working
Invoke-Command -Session $s -ScriptBlock { whoami };
[/code]
When run and successful, the above script should output the username of the local administrator in the new VM.
Next, we need to copy over any installer files we want to have available on the disk. For my purposes, I want SQL Server, Octopus Deploy Tentacle and Redgate's DLM Automation installer. I also need a certificate for the Octopus Tentacle, but I'll get onto why in a later post. I've put all of the files into:
C:\InstallFiles
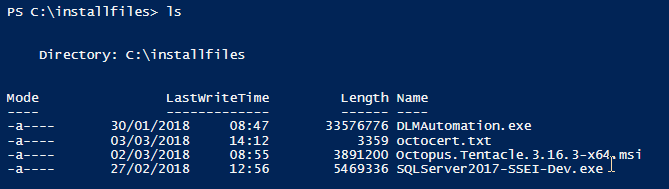
So let's copy all of these files into the same directory in the new VM using the following script which assumes the session from earlier is still open and available:
[code language="powershell"]
Invoke-Command -Session $s -ScriptBlock { mkdir C:\InstallFiles };
Copy-Item -ToSession $s -Path "C:\installfiles\Octopus.Tentacle.3.16.3-x64.msi" -Destination "C:\installfiles\OctopusTentacleInstaller.msi"
Copy-Item -ToSession $s -Path "C:\installfiles\SQLServer2017-SSEI-Dev.exe" -Destination "C:\installfiles\SQLServerInstaller.exe"
Copy-Item -ToSession $s -Path "C:\installfiles\DLMAutomation.exe" -Destination "C:\installfiles\DLMAutomation.exe"
Copy-Item -ToSession $s -Path "C:\installfiles\octocert.txt" -Destination "C:\installfiles\octocert.txt"
[/code]
You'll notice I rename the installer files when I copy them so that if the version number or names change later I don't have to change any downstream scripts that run them.
At this point, you may choose to install IIS or prepare an installation of SQL server. I'm not because I want a very generic base image, that can be customised later on by the octopus process. Both approaches have their pros and cons, though if you do install or prepare your IIS or SQL server installs now, you are guaranteed that version when it runs; something that may be useful if you're going to use this process to create production machines. Equally, you may wish to create a generic base image and then from that create more specific images using a build server.
However, for me, the next step is to sysprep the machine before we template it. Running sysprep on a machine resets the machine such that it can be copied and deployed as many times as you wish without any issues (such as duplicate SIDs). We're going to make use of an answer file to provide a product key and default local administrator password, so that as soon as the machine is deployed we can connect to it remotely without any manual intervention.
A sample answer file can be downloaded from here: https://manage-docs.citrix.com/hc/en-us/articles/212714603-Prepare-Windows-Server-VM-templates-for-deploying-blueprints#sysprep
The above link also contains some useful steps for actually running the sysprep process for multiple target types. The unattend.xml file will need to have the following sections modified:
[code language="xml"]
<ComputerName>*</ComputerName>
<ProductKey>YOUR PRODUCT KEY HERE</ProductKey>
<RegisteredOrganization>YOUR ORGANIZATION NAME HERE</RegisteredOrganization>
<RegisteredOwner>YOUR REGISTERED OWNER HERE</RegisteredOwner>
[/code]
Leaving the 'ComputerName' node with '*' will cause a new name to be auto-generated.
[code language="xml"]
<AdministratorPassword>
<Value>DEFAULT_LOCAL_ADMIN_PASSWORD</Value>
<PlainText>true</PlainText>
</AdministratorPassword>
[/code]
And the above will set the default admin password for you so you can avoid any manual intervention. As before, we need to copy the answer to the VM so that it can be used by sysprep; I've placed it into a folder named 'unattend' on the c: drive.
[code language="powershell"]
Invoke-Command -Session $s -ScriptBlock { mkdir C:\unattend };
Copy-Item -ToSession $s -Path "C:\unattend\unattend.xml" -Destination "C:\unattend\unattend.xml";
[/code]
At this point, if I were building this process for production or end-user machines, I'd add an extra script file to ensure that the unattend.xml file was deleted before anyone could access it. We really want to prevent people from accessing product keys, default admin passwords etc... Though as this is specifically for a dev/test VM, I'm not going to go through that process here.
We've now completed all of our prep work and can finally run the sysprep process. I find that it's easier to actually log in to the VM and use the console directly for this step because I can see the sysprep dialog and watch the machine go for its shutdown.
Once you're logged in, run the following:
[code language="bash"]
c:\Windows\System32\Sysprep\sysprep.exe /generalize /shutdown /oobe /unattend:c:\unattend\unattend.xml
[/code]
And when that's completed, the VM will shut down and you're ready to export it. Simply run the following PowerShell to achieve this:
[code language="powershell"]
Export-VM -Name "$vmName" -Path "C:\ExportedVirtualMachines";
[/code]
You'll now be able to find the .vhdx file you'll need for part 2 at the following location:
C:\ExportedVirtualMachines\W2K16Template\Virtual Hard Disks\w2k16template.vhdx
The full PowerShell script file including everything above can be found on GitHub here: https://github.com/yakcam/BlogScripts/blob/master/CreateTemplateVM.ps1
If you are going to use that .vhdx file straight away, please please please, as soon as you start the VM up, change the local admin password to something secure and unique.
As ever, if you have any issues please don't hesitate to get in touch via the comments below or on Twitter. I'm also on the SQL Community slack channel - more details here: https://sqlslack.com/